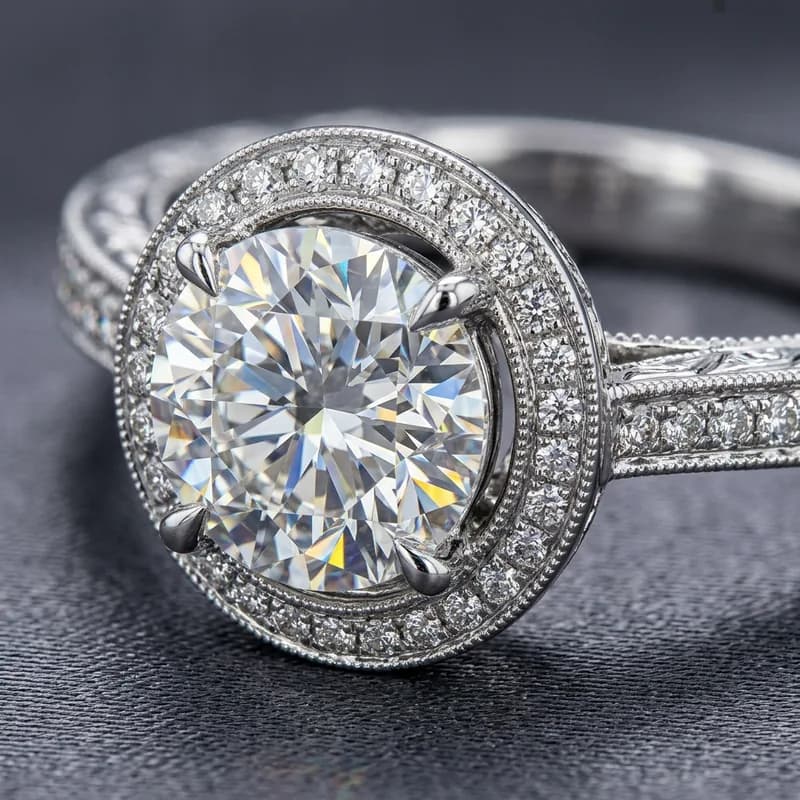
If you've ever tried to photograph a ring and found that only the stone or only the band is sharp — never both — you've discovered the depth-of-field problem in jewelry photography. At macro distances, even at f/16, your depth of field might be just 1–2mm. A standard ring is 6–8mm deep. Focus stacking is the professional solution, and it's what separates amateur jewelry shots from the product images that actually sell.
The Depth-of-Field Problem in Jewelry Photography
Depth of field is the range of distances that appear acceptably sharp in a photograph. At normal distances, stopping down to f/8 or f/11 gives you a comfortable range. At macro distances — the distances needed to fill a frame with a ring or earring — depth of field collapses to millimetres.
A classic example: photographing a diamond engagement ring from slightly above. The stone sits at one depth, the setting just behind it, the band curves away further still. Focused on the diamond, the band is soft. Focused on the band, the stone is soft. There is no single aperture setting that gets both sharp simultaneously without causing diffraction blur.
This is why using f/22 or f/32 to "maximise depth of field" actually makes things worse — diffraction from a very small aperture softens the entire image globally, giving you a uniformly fuzzy result rather than a sharp one.
What Focus Stacking Is
Focus stacking is the technique of shooting multiple frames of the same subject where only the focus point shifts between shots — everything else stays identical (exposure, lighting, framing, camera position). Software then analyses all frames and combines the sharpest region from each into a single composite image where every plane is in sharp focus.
For a typical engagement ring, this means 15–30 frames. For a complex necklace with multiple elements, it can mean 40–60. The result is an image that would be physically impossible to capture in a single shot.
Equipment You Need
- Macro lens: A 100mm macro lens (Canon, Nikon, Sony, Tamron all make excellent options) is the standard choice. It gives you working distance from the subject and excellent resolution at 1:1 reproduction.
- Tripod: Mandatory. The entire technique relies on zero camera movement between frames. A heavy, stable tripod is non-negotiable.
- Focusing rail (recommended): A macro rail lets you move the camera forward in tiny, precise increments rather than rotating the focus ring. This keeps the framing more consistent between shots. Budget options start around $30; professional rails from Really Right Stuff or Novoflex cost more but are significantly more precise.
- Remote shutter release: Eliminates camera shake from pressing the shutter button. Use a cable release or your camera's built-in 2-second timer.
- Controlled lighting: Softboxes or a ring light. Critically, the lighting must not move or shift between frames — any change in shadows between shots creates alignment problems during the merge.
Camera Settings for Focus Stacking
- Aperture: f/8 — not f/16, not f/22. At macro distances, f/8 produces sharper individual frames than f/16 because diffraction hasn't yet softened the image. You're compensating for narrow depth of field by stacking, not by stopping down.
- ISO: 100 — base ISO for minimum noise. Focus stacking amplifies any noise present in individual frames.
- Mode: Manual — exposure must be 100% consistent between every frame.
- White balance: Manual or Kelvin — not Auto White Balance. AWB can shift between shots and create colour inconsistencies in the merged result.
- Live View: Use live view with zoom to precisely check focus on each frame before shooting.
- Shutter: Remote or 2-second timer — no hand contact with the camera during shooting.
Shooting the Stack
The process is methodical. Set up your ring or piece on the shooting surface. Frame it. Lock everything down.
Start with focus on the nearest detail — for a ring, this is typically the closest point of the stone or setting facing the camera. Take a shot. Now move the focus slightly further (rotate the focus ring by a tiny amount, or advance the focusing rail by 0.5–1mm). Take another shot. Repeat, working from the nearest plane to the furthest, until you've passed through the entire depth of the piece.
How many frames? A good rule: if you can see that focus has clearly moved between shots, you have enough overlap. If the sharpest region in frame N and frame N+1 don't overlap slightly, you'll have a gap in the merged result. For most rings and pendants: 15–25 frames. For complex pieces with elements at very different depths: 30–50.
Merging in Photoshop
Photoshop's Auto-Blend Layers function is the standard tool for focus stacking:
- Go to File → Scripts → Load Files into Stack
- Select all your frames and check Attempt to Automatically Align Source Images
- Once loaded, select all layers in the Layers panel
- Go to Edit → Auto-Blend Layers
- Choose Stack Images and check Seamless Tones and Colors
- Click OK — Photoshop analyses each layer and creates layer masks to reveal only the sharpest region from each frame
- Flatten the result and begin your retouching
The merge typically takes 30 seconds to 3 minutes depending on resolution and frame count. The result will need some retouching — the blend boundaries occasionally show small artefacts that need to be cleaned up with the Clone Stamp or Healing Brush.
Common Mistakes
- Moving the camera between shots — even a fraction of a millimetre will misalign the stack and create ghosting. Lock everything.
- Inconsistent lighting between frames — if a light shifts, flickers, or the power supply causes subtle output variation, the merged result will show banding or colour inconsistency.
- Using f/16 or smaller — diffraction softens the whole frame. Shoot at f/8 and stack more frames instead.
- Too few frames with large gaps — if focus jumps too far between shots, the merge algorithm can't fill the gap and leaves an out-of-focus zone in the final image.
- Not checking each frame in Live View — it's easy to rush and miss that focus hasn't actually moved between two consecutive shots.
Focus Stacking Software: Photoshop vs Zerene vs Helicon
Photoshop's Auto-Blend Layers handles most jewelry stacks well and is the logical first choice if you already own Creative Cloud. For more complex pieces — layered necklaces, pieces with partially transparent elements like resin or certain gemstones — dedicated focus stacking software produces consistently better results.
- Photoshop Auto-Blend: Sufficient for most rings, pendants, and earrings. Included in Creative Cloud. Occasional artefacts at blend boundaries that need manual cleanup.
- Zerene Stacker: Industry standard for complex stacks. Two blend modes (PMax and DMap) give you control over how the software handles edges. Better result on metallic surfaces where Photoshop sometimes produces halos.
- Helicon Focus: Fast processing, good for high frame-count stacks. Three blending methods (A, B, C) each with different edge-handling behaviour. Popular with scientific macro photographers as well as product photographers.
For most jewelry photographers starting out: use Photoshop. If you find the results have consistent artefacts at the boundaries between depth planes, trial Zerene Stacker — it has a free trial period and the improvement on metallic subjects is often immediately visible.
Post-Processing After the Merge
The merged focus stack is the starting point for retouching, not the finished file. Standard retouching steps on a merged jewelry image:
- Clean up blend artefacts: Use the Clone Stamp or Healing Brush at the boundaries between depth planes — the merge algorithm occasionally leaves a smeared or repeated-texture region where it has joined two frames.
- Background cleanup: If shooting on white seamless, the focus stack process can create subtle tonal variation in the background between layers. Gradient maps or a new background layer clean this up.
- Metal retouching: Remove dust, fingerprints, tool marks, and casting irregularities from the metal surface. These are far more visible at the macro distances used in jewelry photography than at normal product distances.
- Stone retouching: Clean up any inclusions or surface blemishes that distract from the stone's appearance. Colour-grade for accurate representation — the camera's rendering of gemstone colour under studio lighting often needs adjustment.
- Final colour check: Compare the finished file against the physical piece. White metals (platinum, white gold) should render neutral, not warm or cool. Yellow gold should match the actual carat colour.
When to Hire a Retoucher
Focus stacking adds significant time to a jewelry photography workflow. Shooting 20-frame stacks for 10 pieces, then merging and retouching each, can take a full day. For brands shooting catalog quantities — 50, 100, 200 pieces per season — this is where professional retouching services make economic sense.
The time calculation is straightforward: if you're spending 45 minutes per piece on merge and retouch, and your time is worth $60/hour, you're paying $45 per piece in time cost. A professional retouching service typically runs $8–15 per piece for focus stacking plus full retouching. At catalog scale, outsourcing the post-production while keeping the photography in-house is the clear economic decision.
BLACKFOX DIGITAL handles focus stacking as part of our jewelry retouching service. We receive your RAW stacks, merge, retouch, and deliver files ready for your marketplace and website. Send us 5 pieces free to see the result before committing to a full catalog run.