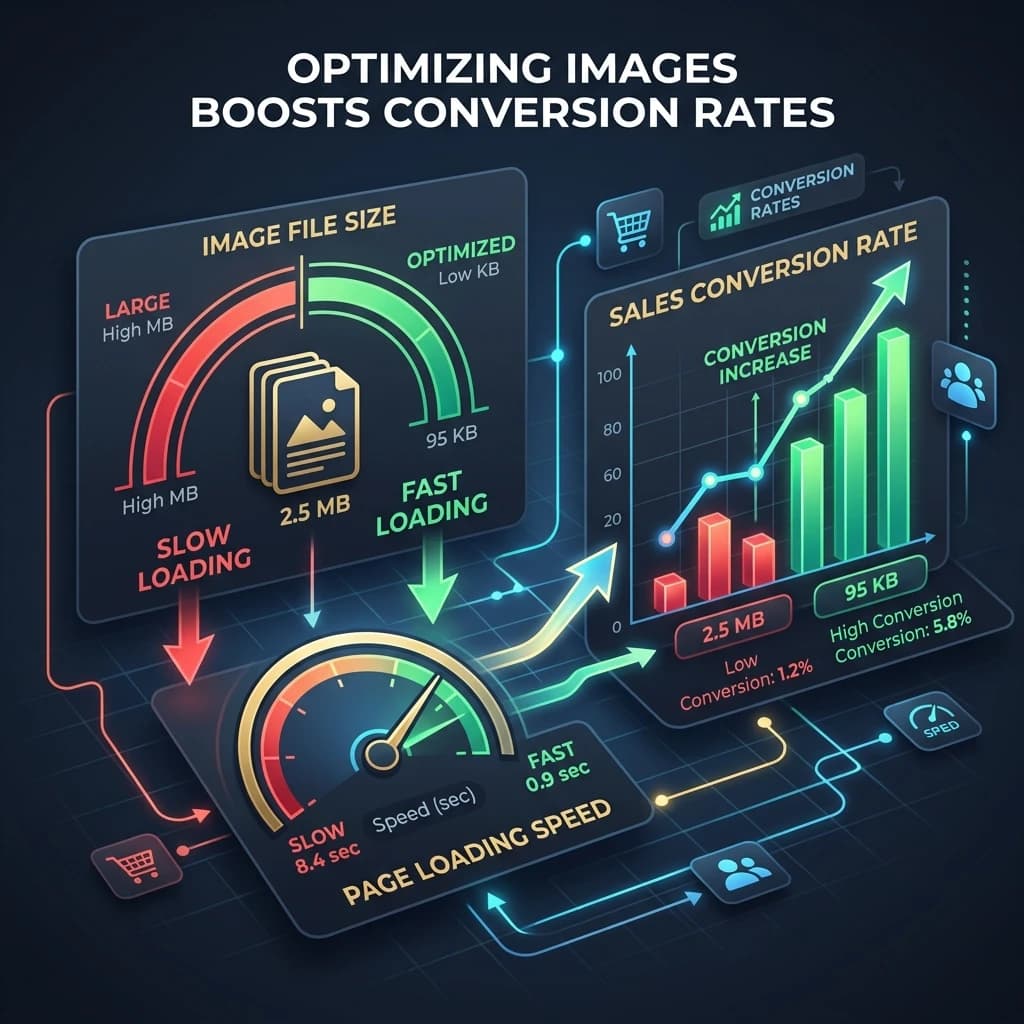
Most e-commerce sellers know large images are bad. Few treat it as an urgent revenue problem. Google and Deloitte research puts a number on it: each 100ms of additional page load time costs approximately 1% in conversion rate for retail sites. On a site doing £100,000 a month, a one-second delay can mean £12,000 in lost annual revenue — from images alone. This guide covers the file size targets, export settings, technical fixes, and the quick audit that lets you find the problems in under ten minutes.
The Research: Speed and Conversions
The link between page speed and sales is well established. A 2019 Google and Deloitte study of 37 retail and travel sites found that a 0.1-second improvement in mobile page speed lifted conversion rates by an average of 8% across sectors. Retail sites showed a 10% improvement in average order value from the same speed gain. More recent Google data from Core Web Vitals research shows that pages meeting the "Good" LCP threshold (under 2.5 seconds) convert at measurably higher rates than pages in the "Needs Improvement" or "Poor" buckets.
Images are the single largest contributor to slow load times on most product pages. A page that loads 3MB of unoptimised images before the buyer has scrolled past the main image is leaving money on the table — specifically, the money that would have come from customers who left before the page finished loading.
File Size Targets: What You Should Be Hitting
There is no universal rule, but industry benchmarks for e-commerce product pages are consistent:
- Main product image (above the fold): Under 100KB is ideal; 200KB is an acceptable ceiling. Above 200KB, you are measurably impacting LCP.
- Gallery images (below the fold): Under 200KB each. Since these are lazy-loaded on properly configured sites, they are less critical than the main image — but accumulated gallery weight affects total page transfer size.
- Absolute maximum for any web-displayed image: 500KB. If you are regularly publishing images over 500KB on your product pages, optimisation should be the first thing you fix before any other conversion work.
These targets are achievable without visible quality loss. A 4000×4000px product photograph exported as a high-quality JPEG at 72dpi can easily reach 8–12MB. Resised to 1500×1500px at web quality settings, the same image typically lands under 150KB. The perceived quality difference on screen is negligible. Our image web optimisation service handles this at scale for stores with large catalogues.
Format Comparison: WebP, JPEG, and PNG
Format choice affects file size significantly. For a detailed breakdown of each format's trade-offs for product photography, see our guide to WebP vs JPEG vs PNG for e-commerce. The short version for page speed:
- WebP is the best choice for web product images. It delivers 25–34% smaller files than JPEG at equivalent visual quality and supports transparency. All major browsers have supported it since 2020.
- JPEG is the reliable fallback. Use progressive JPEG encoding (see below) for faster perceived loading. Quality settings of 75–85 produce near-indistinguishable results at significantly smaller file sizes than quality 95–100.
- PNG should be reserved for images that genuinely require transparency and cannot be served as WebP. PNG files are consistently larger than JPEG for photographic content. Uploading PNGs for product photos that do not require transparency is one of the most common file size mistakes in e-commerce.
How to Export Correctly from Photoshop
Photoshop's "Export As" (or the legacy "Save for Web") dialogue gives you full control over output quality and file size. Use these settings for web product images:
- Format: JPEG (or WebP if your workflow supports it). Avoid PNG for photographic product images.
- Quality: 8–10 on Photoshop's scale (80–100%) is the range most retouchers use. Quality 8 (80%) is indistinguishable from quality 10 (100%) at web display sizes — but the file is 40–60% smaller. Start at quality 8 and check the preview at 100% zoom.
- Progressive encoding: Enable "Progressive" for JPEG. Progressive JPEGs render a low-resolution version of the image almost instantly while the rest loads, which improves perceived loading speed significantly compared to baseline JPEGs that render top-to-bottom.
- Resolution: 72ppi for web. Screen resolution is fixed at the display's pixel density — a 300dpi image displayed at 72dpi adds file weight with no visual benefit.
- Dimensions: Resize to the actual display size before export. A product image displayed at 1500×1500px on your site should be exported at 1500×1500px (or 2×/3000×3000px for retina displays), not left at the original capture resolution of 6000×6000px or higher.
What Not to Do
The most common file size mistake in e-commerce is uploading the same file sent to marketplace print or fulfilment workflows directly onto a website. Amazon and many print services request TIFF files at 300dpi with dimensions of 3000×3000px or larger — sometimes 10–20MB per file. Uploading those TIFFs to your Shopify store or WooCommerce site and letting the platform handle "resizing" does not produce optimised images. The platform may resize the dimensions but often preserves metadata, colour profiles, and other file overhead. Always export a dedicated web version from your retouching software. Never use your Amazon or print delivery file as your website file.
Next.js Image Component and Lazy Loading
If your storefront runs on Next.js (as this site does), the built-in Image component solves several page speed problems automatically:
- Automatic format conversion: Next.js serves WebP automatically to browsers that support it, falling back to JPEG for older browsers — without any manual export step.
- Automatic resizing: Images are resized to the display dimensions defined in your layout. A 3000px image used in a 600px container will be served at 600px (or the nearest configured size).
- Lazy loading: Images below the viewport are not loaded until the user scrolls towards them. This reduces the initial page weight that affects LCP — only the above-the-fold main image loads immediately.
- Priority loading: Add the
priorityprop to your main product image to preload it — this is the image that determines your LCP score and should load without waiting for other resources.
If you are not on Next.js, the equivalent is the HTML loading="lazy" attribute on gallery images, combined with loading="eager" (the default) on the main product image, and explicit width and height attributes to prevent layout shift.
CDN: How It Reduces Image Delivery Latency
A Content Delivery Network (CDN) stores copies of your images on servers distributed globally. When a buyer in Sydney loads your London-hosted product page, their browser fetches images from an Australian CDN node rather than making a round trip to Europe. The latency reduction is substantial — often 200–400ms on international requests, which is the difference between a "Good" and "Needs Improvement" LCP score. Major e-commerce platforms (Shopify, BigCommerce, Vercel-hosted Next.js) include CDN delivery for images by default. Self-hosted WooCommerce or Magento installations often do not — and adding a CDN (Cloudflare, BunnyCDN, or AWS CloudFront) is one of the highest-return performance investments available for those stores.
Core Web Vitals: LCP and Your Product Images
Google's Core Web Vitals are the technical metrics that directly connect image performance to organic search rankings. The most relevant for product pages is Largest Contentful Paint (LCP) — the time from navigation to when the largest visible element finishes rendering. On a product page, that element is almost always the main product image.
LCP thresholds:
- Good: Under 2.5 seconds
- Needs Improvement: 2.5–4.0 seconds
- Poor: Over 4.0 seconds
Pages in the "Good" range benefit from better positioning in Google Search results — the CrUX field data Google uses to evaluate real-user performance explicitly factors LCP. Oversized main product images are the single most common cause of poor LCP scores on e-commerce product pages.
Quick Audit: Check Your Image Sizes with Chrome DevTools
You can audit your product page images in under five minutes using Chrome DevTools:
- Open the product page you want to audit, then press F12 (or right-click → Inspect) to open DevTools.
- Click the Network tab, then reload the page with Ctrl+Shift+R (hard reload with cache disabled).
- In the filter bar, type
Imgto show only image requests. - The Size column shows the actual bytes transferred. Sort by Size descending to find your largest images.
- Hover over any image request to see the full URL and the "transferred" vs. "resource" sizes — if these differ, caching is reducing the transfer size.
- The Waterfall column shows when each image starts loading relative to the page timeline. Images that start late delay LCP.
Any image over 200KB in the Size column warrants re-export. If your main product image is over 100KB, it should be first on the list.
When to Outsource Image Optimisation
For stores with catalogues of hundreds or thousands of SKUs, manual re-export of every image is not practical. Batch optimisation — resizing, format conversion, and quality tuning across an entire image library — is a workflow that benefits from specialist tools and dedicated processing time. Our image web optimisation service handles batch processing of product image libraries, delivering web-ready files sized to your platform's display dimensions, in WebP and JPEG formats, with metadata stripped and file sizes within the targets above. If your Google PageSpeed Insights scores are consistently in the "Needs Improvement" or "Poor" range and images are identified as the contributing factor, submit 5 images for a free sample batch to see what optimised files look like for your catalogue.