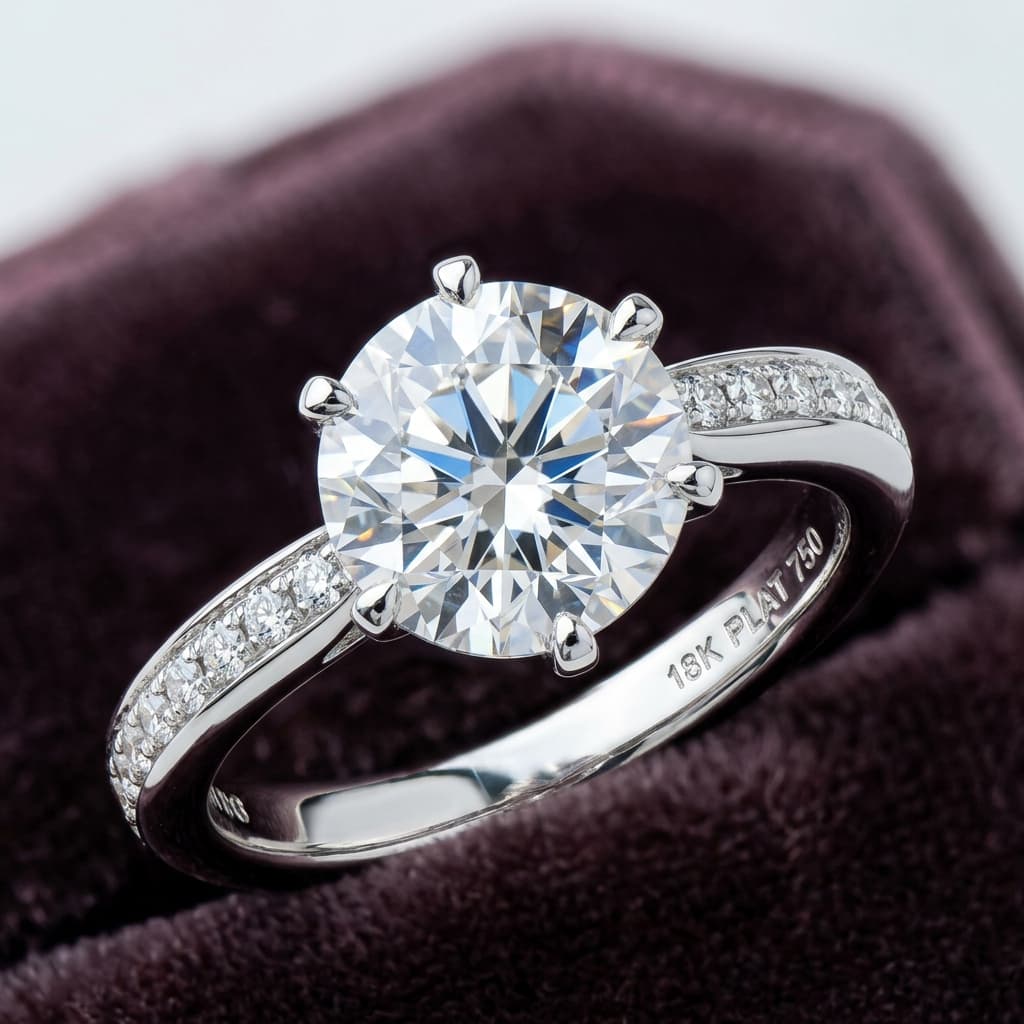
Jewelry is the hardest product category to retouch — reflective metal, transparent stones, and microscopic dust all show up at zoom level. Here's the exact six-step workflow professional retouchers use to get it right.
Jewelry retouching breaks more editors than any other product category. A T-shirt forgives a slightly soft edge. A ring does not. Polished metal reflects everything in the room, gemstones are partially transparent and refract light unpredictably, and a single dust speck becomes a glaring defect the moment a buyer zooms in. This guide walks through the exact workflow professional jewelry retouchers use, step by step, plus the mistakes that separate amateur results from listing-ready images.
Why Jewelry Is the Hardest Category to Retouch
Three properties make jewelry uniquely difficult compared to apparel, electronics, or homeware:
- Reflections. Polished gold, silver, and platinum act like mirrors, picking up the studio ceiling, the photographer, and softbox edges — all of which need selective removal without flattening the metal's natural shine.
- Scratches and dust. Jewelry is shot at extreme close range, often macro. A speck of dust invisible on the table becomes a visible defect at the resolution buyers view product images on luxury and marketplace listings.
- Transparency. Diamonds and gemstones refract and transmit light rather than simply reflecting it. Edits that work on opaque surfaces distort how a stone reads if applied carelessly.
None of this is fixed by brightness and contrast sliders. It requires a deliberate, ordered workflow.
Step 1: Dust and Scratch Removal
Start clean before doing anything else — retouching shine or colour on top of dust just bakes the defect in. The standard technique is frequency separation: splitting the image into a low-frequency layer (colour and tone) and a high-frequency layer (texture and fine detail). Dust and micro-scratches live almost entirely in the high-frequency layer, so they can be cloned out without touching the underlying colour and light falloff of the metal.
- Duplicate the base layer twice; blur one heavily for the low-frequency layer, then use Apply Image / High Pass to extract the high-frequency layer
- Heal and clone defects on the high-frequency layer only — this preserves the metal's natural gradient and reflections
- Work at 100% zoom minimum; defects invisible at fit-to-screen are obvious at the crop level a buyer will actually use
- Check every facet edge and prong individually — dust collects in recesses and settings far more than flat surfaces
Step 2: Background Cleanup
This is where automated tools consistently fail on jewelry. AI background removal is trained on solid, opaque subjects with reasonably clean edges — a shoe, a bottle, a garment. Jewelry breaks that assumption: gemstones are semi-transparent, so an AI matting model can't cleanly decide where the "edge" of the stone is, and metal edges are often thinner than a single pixel, causing AI tools to clip the prong entirely or leave a visible halo. We cover the specific failure patterns in why AI background removal fails on jewelry.
- Use a manual pen tool or precision masking for the outer silhouette — never trust automated edge detection on prongs, chain links, or facets
- Preserve the natural shadow or reflection beneath the piece if the brand style calls for it
- Zoom to 200%+ when masking around stone settings — a half-pixel error is invisible at preview size and obvious at full resolution
- Keep a separate alpha channel for re-use across colour variants of the same piece — saves time on multi-SKU catalogs
Step 3: Enhancing Metal Shine
Metal shine is built with dodge and burn, not saturation or contrast sliders. The goal is to follow and slightly enhance the existing highlight and shadow structure captured in-camera — not invent new ones that don't match the piece's actual form.
- Dodge along existing highlight ridges to deepen specular shine — low opacity, soft round brush, build up gradually
- Burn into recessed areas and the underside of curves to add dimensionality, matching where shadow would naturally fall
- Use targeted HSL adjustments to correct colour cast — gold should read as gold, not yellow-green from fluorescent light; silver and platinum should stay neutral
- Avoid over-sharpening. The most common mistake in jewelry retouching — pushing sharpening or clarity too far creates a harsh, "rendered" look rather than the soft realism of real polished metal.
Step 4: Gemstone Colour — Enhancement vs Misrepresentation
This step carries real commercial and legal stakes. There's a meaningful line between acceptable colour enhancement and image manipulation that misrepresents the product — crossing it drives returns, chargebacks, and on some marketplaces, listing penalties.
- Acceptable: correcting colour cast from studio lighting so the stone reads its true colour under neutral light; boosting saturation slightly to compensate for sensor flattening, within what a human eye would perceive in person
- Not acceptable: shifting a stone's hue to a different colour family, increasing clarity/saturation beyond the physical stone, or removing visible inclusions that are part of the gem's actual characteristics
- For diamonds specifically: don't over-brighten. Pushing exposure and whites too far washes out the micro-contrast between facets that creates a diamond's "fire"
- When in doubt, retouch toward what the eye saw under proper lighting at the shoot, not toward what looks most dramatic on screen
Step 5: Reflection Control
Polished jewelry reflects the entire shooting environment — softbox edges, the camera, the photographer's hand, ceiling fixtures. Some of this needs full removal; some needs softening rather than elimination, since a totally reflection-free polished surface looks unnatural and flat.
- Identify and clone out clearly identifiable reflections — visible studio equipment, light stands, anything that reads as "studio" rather than ambient environment
- Soften but don't eliminate the diffuse reflections that give metal its sense of roundness and polish
- Pay particular attention to curved surfaces like rings and bangles, where reflections wrap around the form
- Check reflections in accompanying stones or crystal elements separately from the metal — they behave differently and often need separate masking
Step 6: Focus Stacking for Depth of Field
Macro jewelry photography has an inherent problem: at the magnification needed to show fine detail, depth of field becomes extremely shallow — often just a few millimetres. Focus stacking solves this by blending multiple exposures shot at different focus points into a single image with full depth of field. We cover the full technique in focus stacking for jewelry photography.
- Source images need 8-15+ frames at incrementally shifted focus points, covering the full depth of the piece
- Stacking software aligns and blends the sharpest regions of each frame — manual touch-up is usually needed where automated blending introduces haloing
- Retouching for dust, shine, and colour should happen after stacking is finalized, not on individual source frames
Common Mistakes
- Over-sharpening. Creates an artificial, rendered look instead of believable polished metal — the most common giveaway of inexperienced jewelry retouching.
- Over-brightening diamonds and gemstones. Loses the facet-to-facet contrast that creates visible "fire" — an overexposed diamond photo looks duller in practice, not brighter.
- Trusting AI cutout tools on prongs and chain links. Thin metal elements get clipped or haloed almost every time; manual masking is still required.
- Flattening all reflections. Removing every reflection makes polished metal look matte and plastic rather than precious.
- Editing colour to taste rather than to truth. Pushing a stone's hue or clarity beyond physical reality increases returns and erodes buyer trust.
When to Outsource Jewelry Retouching
This workflow is achievable in-house for a handful of hero shots. It becomes a different problem at catalog scale:
- Volume. Frequency separation, manual masking, and focus stack cleanup are slow, deliberate processes. A catalog of 200+ SKUs at this level of care is a full-time job.
- Complexity. Mixed-metal pieces, pavé settings, and coloured gemstone combinations each need slightly different handling.
- Consistency requirements. Marketplaces and luxury retailers expect uniform colour, shine, and background treatment across an entire collection — exactly what a dedicated retouching team and QA process is built around.
For catalogs where consistency, turnaround, and specialist technique matter more than doing it in-house, our jewelry photo retouching service handles the full workflow above — dust and scratch removal, background cleanup, metal shine, accurate gemstone colour, reflection control, and focus stacking — at production scale.
What to Look for in a Jewelry Retouching Studio
Not every retouching studio handles jewelry competently. The category requires specific skills that general product photo editors often lack: understanding of how different metals scatter light, experience with transparent and translucent gemstones, and familiarity with luxury retail presentation standards.
When evaluating a retouching partner, request samples that include white gold (easily confused with silver under warm lighting), stones with high refractive indices like diamonds and sapphires, and pieces with textured surfaces like hammered metal or pavé settings. These are the scenarios where weak technique shows immediately — over-smoothed metal loses its character, and gemstone colour that shifts between images destroys buyer trust at scale.
Turnaround matters for seasonal collections. Ask specifically about batch capacity and how consistency is maintained when multiple retouchers handle the same collection. A QA layer with a defined visual reference — rather than relying on individual judgement — is what separates studios that scale from those that don't. If you have an upcoming collection ready to process, submit a free sample batch and evaluate the results against these standards before committing to a full run.