Shoes are one of the hardest products to photograph well: shiny leather, mesh, laces, soles and a dozen colorways that all need to match. Here are the angles shoppers expect, how to light and set up a shoe shoot, and how professionals retouch footwear for marketplaces and online stores.
Footwear is one of the most image-dependent categories in e-commerce. Shoppers can't try shoes on, so they study every angle: the shape of the toe, the height of the heel, the texture of the upper, the grip of the sole. At the same time, shoes are genuinely difficult to photograph. Patent leather reflects everything, white sneakers clip to pure white, mesh and laces are fiddly to cut out, and every colorway has to look like it came from the same shoot. This guide covers the angles to shoot, how to set up and light shoes, and how to edit them so a whole collection looks consistent and accurate.
The Angles Shoppers Expect
Most successful footwear listings show the same core set of views. Plan your shoot around them so every style and colorway gets the same coverage:
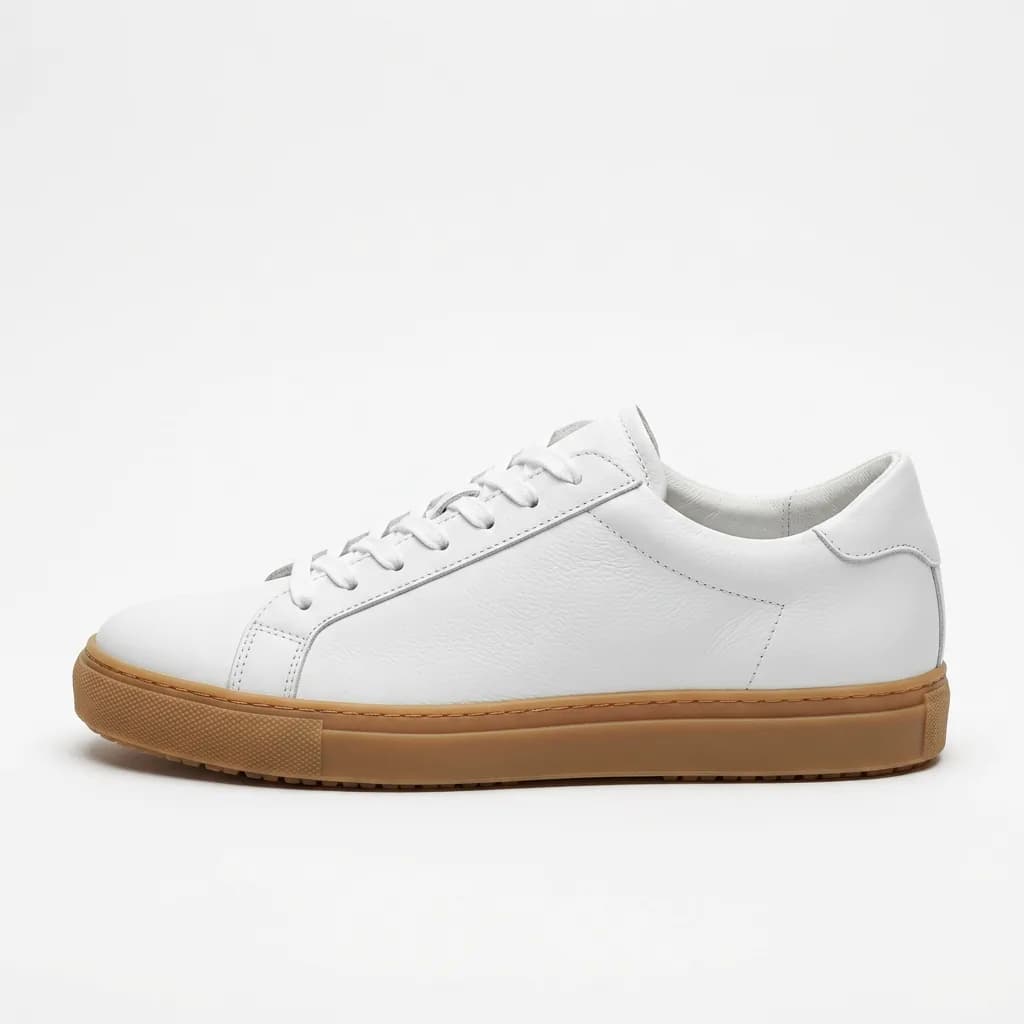
- Side profile (outer side): the defining shot that shows silhouette, heel height and sole thickness. Many stores use it as the main image.
- Front three-quarter (about 45°): shows the toe shape and the side at once, and gives the most three-dimensional impression.
- Front (toe): width and toe-box shape, important for comfort-focused shoppers.
- Back (heel): heel counter, pull tabs and heel shape.
- Top-down: the opening, insole and lacing from above.
- Sole: tread pattern and materials, essential for running, hiking and work shoes.
- The pair: both shoes together, often one in profile and one at three-quarter, to show they're a matched set.
- Details: close-ups of stitching, texture, hardware and branding, which justify a premium price.
- On foot: lifestyle or worn shots show scale and how the shoe looks in real life.
Marketplaces sometimes specify which view goes first. Amazon's footwear category, for example, has long asked for a single shoe rather than a pair as the main image, and several fashion marketplaces specify the direction the toe should point. Check the current style guide for each platform you sell on; our guides to Amazon image requirements and Zalando image requirements cover two of the strictest.
Preparing Shoes for the Shoot
- Stuff them: fill each shoe with tissue or foam so the upper holds its shape and doesn't crease or collapse.
- Tidy the laces: lace evenly, tuck or flatten loose ends, and make both shoes in a pair match.
- Clean everything: remove dust, fingerprints, price stickers and storage marks. Soles that will be photographed should be spotless.
- Remove tissue and tags that show: hang tags, plastic inserts and paper stuffing visible in the opening all need to go before the shot, or be retouched later.
- Plan support: museum putty, small clear stands and fishing line hold shoes at angles and upright for sole shots. They're removed in editing.
Lighting and Camera Setup
- A white sweep and a large soft key light: a big softbox or diffused light above and slightly in front gives even light and soft, flattering highlights on leather.
- Fill from the other side: a reflector or second light opens up the shadow side so dark shoes keep their detail.
- Watch shiny materials: patent leather, metallic finishes and glossy rubber reflect the studio. Move lights and use black and white cards to shape clean highlights, and see our guide on removing reflections in Photoshop for cleanup.
- Expose white shoes carefully: a white sneaker on a white background easily loses its edges and texture. Light the background separately and slightly brighter than the shoe so the shoe keeps its detail.
- Use a longer focal length: a short lens close to the shoe exaggerates the toe and distorts proportions. A short telephoto from further back keeps the shape true.
- Lock everything down: a tripod, a fixed camera height and tape marks on the sweep for each angle mean every colorway is shot identically.
- Stop down for depth: shoes are deep objects. An aperture around f/8 to f/11 keeps toe and heel sharp, and focus stacking helps for close details.
Shooting a Collection Consistently
The real test of footwear photography is the category page. Twenty colorways of the same sneaker should look like twenty images from one shoot: same angle, same size in the frame, same light, same shadow. Shoot every colorway of a style in one session without moving the camera, keep a reference image on screen to match against, and photograph a grey card with each batch so color can be corrected accurately later.
Editing Shoe Photos Step by Step
- Background removal: shoes have mostly hard edges, so a hand-drawn clipping path gives the cleanest result. Mesh panels, fur linings, laces and frayed details may need masking instead. Our guide to clipping paths vs background removal explains the difference.
- Remove supports and props: clone out stands, putty, fishing line and visible stuffing.
- Clean the product: remove dust, lint, glue marks, scuffs and loose threads, and soften storage creases in leather while keeping its natural grain.
- Fix the laces: straighten crooked lacing, even out loops and match the two shoes of a pair.
- Correct the color: match each colorway to the physical sample, not to how it looked on camera. Accurate color is the single biggest factor in footwear returns, as we explain in our guide on color correction to reduce returns.
- Add a consistent shadow: a soft natural shadow or a subtle reflection under the sole grounds the shoe. Use the same type and strength on every image. See drop shadow vs reflection shadow for the options.
- Align and size: place every shoe at the same position and scale on the canvas, and crop to each platform's required dimensions.
Tips by Shoe Type
- Sneakers: mesh, knit and layered panels need careful edge work, and soles often have translucent or multicolor parts that must stay true. Show the outsole: many buyers care about grip and cushioning.
- Leather dress shoes: polish them before the shoot, light for a soft gradient along the toe, and keep the grain visible. Overly smooth retouching makes real leather look like plastic.
- Boots: tall shafts collapse without stuffing or an internal support. Show the zip, laces or pull loops clearly, and include a back view for heel and shaft shape.
- Heels: the profile view is the most important, because heel height and shape sell the shoe. Keep the camera level with the heel so its height isn't distorted.
- Sandals and slides: straps need to sit neatly and symmetrically. Top-down views matter more here, since shoppers want to see the footbed.
- Kids' shoes: show closures such as hook-and-loop straps and toe protection clearly, and include an image that conveys scale, because parents buy on practicality.
White Sneakers: A Special Case
White shoes are among the most common and most difficult footwear images. On a pure white background, the edge of a white sole can disappear and the image looks unfinished. Retouchers solve this by keeping a subtle shadow and a faint edge line, making sure the shoe itself reads just below pure white so texture shows, and checking that the "white" of the shoe matches the real product, which is often slightly off-white or cream rather than bright white.
Colorways: Shoot or Recolor?
When a style comes in many colors, it's tempting to shoot one and recolor the rest in Photoshop. That can work for simple, single-color uppers when you have accurate color references, and it saves studio time. It works poorly for shoes with multiple materials, textures or contrasting soles, where recoloring looks artificial. In general, shoot every colorway you can, and use recoloring only for close variants, checked against a physical sample. Our multi-clipping path guide explains how separate paths for each part of a product make accurate recoloring possible.
Going Further: 360° and On-Foot Imagery
For premium footwear, a 360° spin lets shoppers rotate the shoe and see every angle themselves, and on-foot images show proportion and styling that a studio shot can't. Both increase confidence in a category where fit and look are everything. Our guide to 360-degree product photography covers how to shoot and edit spin sets.
Common Shoe Photography Mistakes
- Inconsistent angles across colorways: a category page where every shoe points a slightly different way looks careless.
- Wide-angle distortion: a giant toe and a tiny heel make the shoe look nothing like the real thing.
- Dirty or scuffed soles: especially visible in sole and three-quarter shots.
- Color drift between colorways: two shades of black or white that don't match look like a quality problem.
- Messy or mismatched laces: the first detail shoppers notice in a pair shot.
- Lost edges on white: white soles disappearing into a white background.
A Quick Checklist Before You Publish
- Every colorway shot at the same angles, size and position in the frame.
- Colors checked against the physical samples, under neutral light.
- No supports, stuffing, tags, dust or glue marks visible at 100% zoom.
- Laces even and matched across the pair.
- The same shadow style on every image, and a clean edge on white soles.
- Each image exported at the size and format each marketplace requires.
Let a Footwear Specialist Handle the Editing
Footwear editing is detail-heavy and repetitive: dozens of angles, dozens of colorways and every one held to the same standard. Our clipping path service gives every shoe a clean, hand-drawn edge, our shadow and reflection service grounds each image consistently, and our color correction service keeps every colorway true to the sample. For shoes with separate materials, we draw separate paths for upper, sole and laces so each part can be recolored or refined on its own. Start a free trial and send us a few styles to see the results.